Lunes, Hunyo 17, 2013

Roles, Significance, Importance of Sound/Audio in the Animation Production Pipeline


First thing first, We were given a task by our teacher to reflect on the roles, significance, Importance of sound/audio in the animation production pipeline.


Animation Pipeline

As you can see, sounds are playing an important role in the animation. It is unconsciously done in different level of production. You need to make a sound that will be appropriate and perfectly fit on your animation. Have you ever watched an animation that has no sound? Can you imagine how dull it is to watch an animation film that has no sound?


Sounds effects play an important role because it conveys action that you want to let your viewers understand. Sounds help express emotion. It helps establish the mood and feel the atmosphere of the animation. Adding it to the animation give life to the characters and give meaning as it cry, sad, happy, scream or any action.


Sounds are very essential because it helps you relate to the story of the film and it gives you the best experience, like you can feel that you are part of the movie, an example of it are horror films. Which will likely give you an intense feeling, character that is screaming without a sound or character that is screaming with a sound? I bet it can easily attract you if there is a sound. Most of the viewers will also like to join the character on shouting if they can hear the character shouting, they basically get carried away more easily with sound in it. 


These are the things that I believe that music/sound is very important. Based from my experience as an animator student, sounds will be really great to give more life and meaning in your animation. Hope you learn something!  Good luck!

Lunes, Agosto 22, 2011

my photorealistic vector art


PLS CRITIQUE MY WORKS


Vecotr art(2)


Another vector art?

PLS CRITIQUE MY WORKS

Vector art


My vector art.
PLS CRITIQUE MY WORKS

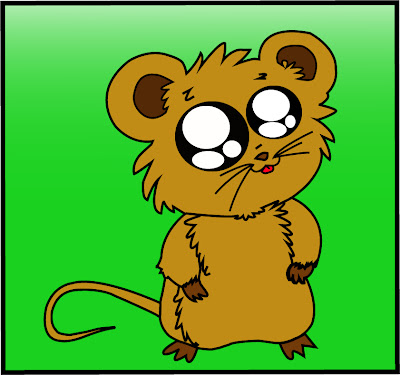
Cutie Jerry


As of my previous, this is another cute rat.


Things used in Adobe Illustrator:

-Pen tool
-Swatches
-Color
First, you need to use pen tool to make a path to be filled with colors/strokes. In this case. my path is color blue and black. And I filed them with colors like white, gray, and light blue and have a background filled with yellow green.


PLS CRITIQUE MY WORKS

CUTIE CAT


Things used in Adobe Illustrator:


-Pen tool
-Swatches
-Color


First, you need to use pen tool to make a path to be filled with colors/strokes. In this case. my path is color blue and black. And I filed them with colors like white, gray, and light blue and have a background filled with yellow green.


You can now make your own a cute animal character.

PLS CRITIQUE MY WORKS

My 3D flower vase


1.Create a Path

First, create a path like the image shown below with the Pen Tool, go to menu Effect > 3D > Revolve
create a path

3D Revolve Option

The 3D Revolve Option window should pop-up and looks like the image below. Click onMore Options if the lower portion window is not showing. You can leave most of the settings as default, but add an additional light spot by clicking on the New Light icon and drag it to the lower left corner as shown. Enter 35 for Blend Steps, maximum Blend Steps is 256, higher Blend Steps will have a better rendering quality but will also increase the file size.
3d revolve options

2.Create the Flower Symbol

Now use the Ellipse Tool, create a flower like the image below. I have a very simply flower illustration here, but you can create anything you like. Drag the flower to the SymbolsLibrary Pallate to create a new symbol. If your Symbols Pallate is not showing, pressCtrl+Shift+F11 or go to Windows > Symbols to show Symbols.
create the flower symbol

3.Create Map Art

With the vase object selected, in Appearance Pallate, double click on the 3D Revolve effect icon(f) to change the 3D Revolve Options.
appearance
When the 3D Revolve Option window pop-up, click on the Map Art button.
map art

Map Art Option

Check Preview option to preview the result. At the top where it says Surface, use the arrow buttons to locate the surface that you want to Map Art. Notice there is a red wireframe on your object which shows you the surface you’ve selected. In this case, it is 4 of 5. From the Symbol drop down, select the symbol that you’ve created in the previous step. You can position and resize the symbol as you want. You can also create multi-surface Map Art by selecting the Surface then the Symbol. Click OK when you are happy with the result.
map art options

Final

That’s it! With just 3 simple steps, I just created a nice 3D Vase with Illustrator 3D Revolve Tool.
final


Stylish Vector Flower


1.Flower Petal


Create two stroke paths: one yellow and one blue.


2.Blend Options


Go to Object > Blend > Blend Options and set it to Specified Steps = 10. Specified Steps basically tells how many step to blend from 1 object to another.


Blend


Now select the 2 petal paths, go to Object > Blend > Make or press Ctrl + Alt + B and you should get something looks like the image shown below.


3.Duplicate More Petals


Duplicate more petals to form the flower by Copy & Paste or Alt + Drag.


4.Stem


Create a stem by using the same Blend technique as in the previous step. Here I set theSpecified Steps = 8.


5.Leaf


The leaf is formed by 2 parts, top and bottom. I use Specified Steps = 5 here.


6.Put Them Together


Now put them together to create a beautiful flower.


7.Right Long Leaf


Create a long leaf with Blend step = 3.


8.Left Long Leaf


Repeat the previous step to create the left long leaf.


Final


Your final image should looks like the image shown below:


PLS CRITIQUE MY WORKS